A Winter Home Maintenance Checklist to Handle the Cold

Winter’s upon us, and as the holiday season settles in, we gather the family ‘round and let the festivities kick in. While all of that is the good stuff, winter’s got some bad stuff up its sleeve too, especially for your sweet abode. Thankfully, maintenance work and due diligence can help. Our homes tend to protect us a lot better when we take care of them. Besides, the cost of maintaining your home is almost always less than repairing the damage.

We’ve compiled a nifty winter home maintenance checklist to lead you along. Be it snow, sleet or winter storms, the big freezy conclusion to the year should remain an absolute breeze for you. 

Lighting maintenance

1. Lighten up!

 Outdoor lighting isn’t just about enhancing aesthetic appeal, but also safety. When there’s minimal natural lighting and rather treacherous territory to contend with, you need sufficient lighting to cover the area, especially around entrances. Lighting up the pathways is essential so you aren’t bumbling around at night. Get yourself some good outdoor lighting to not only add serious zing to your home’s appearance, but to avoid a painful tumble.

2. Run maintenance on your lighting system
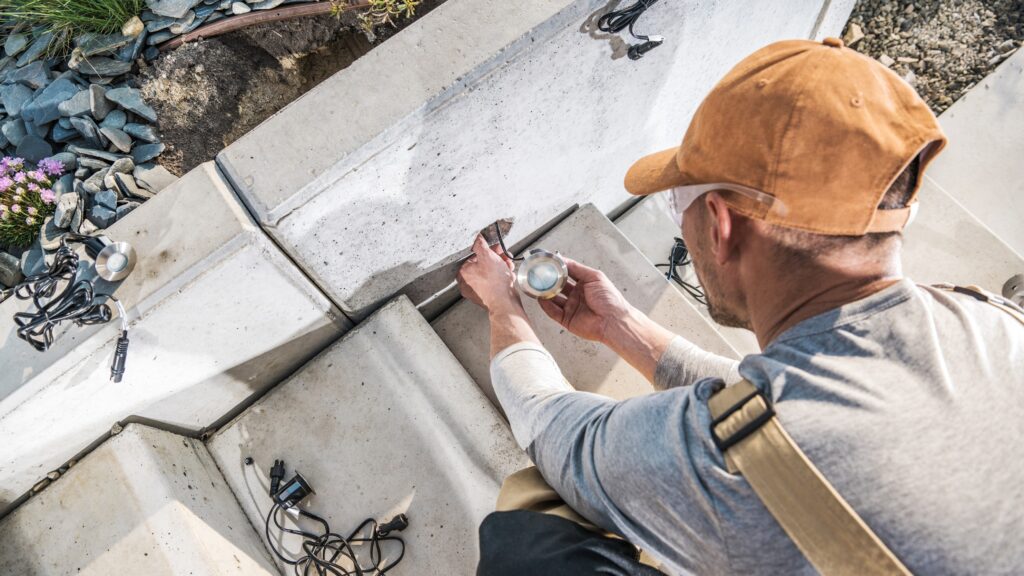
Part of outdoor lighting is to ensure that your system can handle the rigors of winter. Make sure the lighting transformer is in good shape, and check the wiring and connectors. Keep your lighting fixtures cleaned off — don’t allow ice and debris to collect — and you should be golden.

3. Automate your lighting system
Given that the days will be shorter, set a timer for your lights to come on early. Not only will you have your front yard lit up at all times, you save energy.

Inclement weather prep

1. Get storm windows ready,
Your window screens might be overdue for a replacement. Even if you don’t use storm windows, it is good to replace or repair screens, tighten shutters, and be sure that windows seal completely before storms are in motion.

2. Waterproof and get that sump pump in order!
Seal any cracks in the walls, and make sure the sump pump in the basement is working properly. If you haven’t already cleaned debris out of gutters, do so now. Make sure gutters are attached correctly and are taking the water away from your house rather than routing it back to you.

3. Be ready for chaos.
Along with installing storm windows and doors, trim any tree branches surrounding your home to ensure minimal structural damage. Stock up on essential supplies to handle storms: salt for walkways, a good snow shovel, hand warmers, and thick work gloves, an ice scraper, flashlights, and batteries. Check that pipes are well-insulated and go through the efficiency tips below to ensure that your home retains heat. 

Winter home efficiency checklist

1. Look after the thermostat.
You might as well practice a bit of austerity in terms of using the heating system. If you turn down the thermostat a little, you can make some real savings. A favorite homeowner tip for the winter we swear by is reversing the ceiling fans. Have it run in a clockwise direction after you turn on the heat. This creates an updraft and brings down some of the hot air that rises to the ceiling. It’s a pretty neat way of saving energy while staying comfortable.

2. Get a ’Home Energy Audit’ done.
A Home Energy Audit basically entails a professional attaching a blower to your door to create suction and then seeking out any cracks where the air might seep through. This might sound simple, but it can make a ton of difference. A few tweaks to your home can save energy and keep you more comfortable in winter. 

3.  Replace the weather-stripping
Weather-stripping comes in many forms and is sometimes overlooked in the grand scheme of things. Over time, it wears off and needs changing. You may also need to reapply caulk; consider silicone caulk, which does not shrink and largely remains unaffected by elements on the outside.

With a bit of smart maintenance and good preparation, you can take the proverbial chill pill. Relax, do a little spring garden planning, and stay cozy all winter long.

Want to Improve Your Home’s Look? Upgrade the Outdoor Lighting in these 4 Areas

There’s nothing quite like coming home to a well-lit house at the end of a long day. Those St. Louis winter days may be gray and cloudy, but your home can be bright and inviting. Plus, it’s great to be able to see what you’re doing when you’re coming and going, now that it’s dark when you leave and when you get home. 

While you’re probably not spending as much time outside on cold days, good outdoor lighting is still important. Not only does it make your house look cozy and welcoming from the outside, good exterior lighting also makes everything look better from inside your home, looking out. With bare trees and less foliage giving you a clear view, let’s take a look at four areas that could probably use an outdoor lighting upgrade

Front porch lighting ideas

Front porch lighting is one of the first things guests see when they come to your home, so make sure it creates a good impression. There are a few different ways you can light up your front porch, depending on the size and style of your home. For example, if you have a small porch, you might want to add a sconce on each side of the door. If you have a larger porch, you could install an additional ceiling-mounted fixture. Consider upgrading your lighting fixtures to match your home’s decor or exterior paint for a cohesive look. 

Go outside at dusk and look at your front porch from your yard or the curb. Does it seem too shadowy or too bright? Look into modern low-voltage LED fixtures which have adjustable brightness, or intensity. You want the front porch glow to be welcoming, not overwhelming. If there are dark corners or dim areas, you may need another fixture or two. Also, remember that lighting for the front porch can come from fixtures that are on the sidewalk or in the landscaping in front of the porch, such as spotlights aimed at a low angle toward the house. See more about home uplighting.

Upgraded pathway lighting

Are you still relying on flimsy solar lights along sidewalks and walkways? While we love the idea of solar lights, the truth is that they’re just not dependable and often don’t last more than a season. We recommend low-voltage LED lighting for exterior pathway lighting, and here’s why: 

  1. It’s energy efficient: you’ll use less energy and save money compared to older systems. 
  2. LED bulbs have a long life, too. 
  3. We use timers that adjust for seasonal changes so lights are on when you need them. 
  4. LED bulbs are adjustable in intensity. 

We use high-quality fixtures made of the best materials and with long — sometimes lifetimes — guarantees. Over the long run, it’s better to invest in one energy-efficient system that will last for years than to replace solar lighting fixtures every year. See more about pathway lighting.

Lighting ideas for outdoor stairs

It’s easy to overlook lighting for outdoor stairs, but you really shouldn’t. First of all, think about safety. Of all the places around your home, which one is most likely to trigger a fall? The unseen stair, that last missed step. Lighting helps with this, of course, so people can see where they’re going. 

So what kind of lighting works on your outdoor stairs? Here are a few ideas:

  • Wash lighting can be installed directly on the vertical lift of the stairs, providing a horizontal, downward angled beam of light on each stair. 
  • Pathway lighting fixtures can be installed just outside of stairs, on each side. 
  • Rail lighting can be installed on stair railing. 

You probably don’t need all three types of lighting. If you don’t have much lighting nearby (such as a porch light or landscape lighting), you might need a combination. For example, rail lighting and wash lighting provides a soft beam of light on both the stair surface and on handholds. 

Upgraded outdoor lighting for hardscaping

Technically, hardscaping includes both sidewalks and stairs, which we’ve already discussed. But what about those other little areas that need outdoor lighting, like that low stone wall in front of the flower beds? They can be kind of tricky. Where do you put the fixtures? Where should the light be pointed? How much light do you need? 

The short answer is that it depends on each area. For example, if it’s a low stone wall serving as the perimeter for flower beds, you probably want to install spotlights that highlight the flower beds and show off the seasonal plantings. However, if you really love the stonework, then you might want spotlights that are set back further and angled to light up the wall itself. 

Not sure exactly how to get started? Schedule a free consultation for your St. Louis home and get all the expert help you need. 

The Power of Upscale Outdoor Lighting for Home and Business

You might not think of outdoor lighting as something that has the power to make or break a home or business, but when you consider how much impact it can have on first impressions, you’ll see why it’s so important. Upscale outdoor lighting can turn an ordinary house into a stunning showplace, and can make a good business look great. By using the latest technology and design trends, we can create an amazing lighting plan that will perfectly showcase your property. 

Let’s take a look.

From dull to dazzling with luxury exterior lighting

There is no doubt that outdoor lighting has come a long way in recent years. Gone are the days of harsh, unattractive floodlights that seemed to have only one purpose: to blind and disorient anyone who came near. 

In our modern world of luxury exterior lighting, outdoor lighting has become an art form in itself, meant to create inviting atmospheres and set the tone for any given space. Whether used as a subtle accent or directly illuminating an important focal point, outdoor lighting can completely transform a home or business. 

Besides, how sad to have a beautiful space with poor lighting or dingy fixtures. It’s hard for people to forget their first impression. To create a sense of polish and quality, imagine your lighting system as one that begins at the very edges of the property and continues all the way inside. 

The best fixtures lead to the best results

At Outdoor Lighting Solutions, we’re down-to-earth people who appreciate the simple things. But simple doesn’t mean cheap! Something we never forget is that quality always matters. Ultimately, your recipe is only as good as your ingredients, right? So we make sure to use the best ingredients — or lighting fixtures — to create absolutely breathtaking results. And it’s working out, because we have the privilege of designing outdoor lighting systems for some of the most beautiful properties in the St. Louis area.

One of the best parts is getting to work with our clients for customization that fits their vision. And with so many different kinds of outdoor lights to choose from today – from classic high-end outdoor lanterns to sleek string lights and everything in between – there is truly something for everyone when it comes to luxury exterior lighting. 

Upscale outdoor lighting for the atmosphere you want

Outdoor lighting serves a variety of purposes, from providing safety and security to highlighting architectural details or creating a warm and inviting atmosphere. 

For luxury homes or businesses, it can be used to create a sense of welcome and invite guests in with dramatic entrances or captivating landscaping. This can be achieved through careful placement and an expert selection of fixtures. By opting for backlighting, ambient lighting, or spotlights that highlight particular features of your exterior space, you can achieve the look you want and make your property truly stand out. Not only that, you’ll also be able to adjust the outdoor lighting for the mood you want to create at any given moment, ranging from festive to subdued. That’s a great ability to have, particularly if you frequently entertain in your home and outdoor spaces, or if you’re a business owner or venue manager. Setting the mood with the environment is one of the keys to success with any event, whether that’s a fun backyard birthday or an elegant dinner party.

When you’re ready to move from dreaming to doing, get in touch. We’ll come to your location, help design the perfect lighting system, walk you through the options, and even create a demo so you can see exactly how the lights will look before installation. It’s a no-guess, no-risk process. We’re proud to be St. Louis’ choice for upscale exterior lighting.

Why Uplighting Is an Absolute Essential for Your Outdoor Lighting System

It’s safe to say that lighting sets the tone for most occasions… and for those cozy non-occasions, too, when you’re not entertaining or “doing” anything, just relaxing. The right kind of lighting strongly influences the mood and comfort level. Some lighting types and fixtures are essential, while others are secondary. You can make do without an interior dome light in your car, but you can’t drive at night without headlights. When it comes to outdoor lighting, uplighting is an essential part of the system. 

What is uplighting?

Simply put, uplighting is placing light fixtures on a surface and angling them so they throw the beam of light upwards. 

It’s not that complicated. 

In fact, the angle of the beam is the primary difference between uplighting and other types of outdoor lighting such as downlighting (light goes down!) and washlighting (light goes mostly across!). 

What fixtures are used for uplighting?

Let’s get into the nitty-gritty now. 

If you’re reading this, there’s a good chance that you’re either a homeowner, or own an office building, restaurant or event venue. We will cover the purpose of uplighting for these specific settings. However, let’s first briefly identify the different kinds of outdoor lighting fixtures you can use: 

  • Bullet lights are pole-mounted or surface-mounted spotlights with a focused beam. The fixture itself is shaped a bit like a bullet, hence the name. Bullet lights can have a very narrow beam or a wider one, and some bullet fixtures are adjustable so the beam can be narrowed or widened as needed.
  • Wash fixtures are most often used for wash lighting, with a low angle so that the light mostly goes across the flat surface on which the fixture is mounted. It’s often used to give walls and other flat surfaces a lower, diffused rush of light across their surface. However, wash fixtures can also be used for areas that would look best with a softer uplight diffused across a wider area. 
  • Well lights are fixtures which are buried or planted in the earth and pointed upward. They’re typically used to cast a gentle, focused uplight. You don’t want the beam to be too bright with well lights since they’re typically used where people are walking or to highlight perimeters or stairs. 
  • Flood lights are a high-intensity type of spotlight with a wider beam than bullet lights. We don’t generally use flood lights for uplighting; they’re more often put in place for security lights, with beams angled downward. However, these fixtures can be mounted and angled to provide uplighting if the situation warrants. 

When choosing the right fixtures, choose high-quality screwable or weldable fixtures made out of marine or powder-coated aluminum. You can also go with copper, bronze, and brass, which last indefinitely and will eventually develop a gorgeous patina. Make sure that all the lights are spaced and angled properly to prevent any shadows or dark spots or light being directed inside.

Exterior uplighting for your home

If your outdoor uplighting is not too great, it can lead to people on the outside having a variety of impressions, from the relatively benign “Surely nobody lives in this dump,” to “Yeah, that looks like a mighty good place to rob.”

Yes, the external lighting of your property can even determine how safe it is. Just so you know there’s no exaggeration, a study by Urban Labs, UChicago posits that increased levels of lighting led to a 36% decrease in crimes. 

With the right spread of fixtures and balanced intensity, you can have the much-vaunted uniformity that lends most homes their attractive look, while helping you on the security front. Uplighting for your home should start with the home itself: exterior uplighting across the front of your house will increase curb appeal and create a beautiful nightscape. 

Then, you can work towards adding strategic uplighting to landscape and features outside your home. 

For instance, you can place uplighting fixtures along the foot of an oak tree, allowing it to flaunt its beautiful structure, the motion of its leaves, the life that resides upon its branches at night. Sounds nice, doesn’t it? Looks nice, too.

Uplighting for commercial buildings

For commercial spaces and office buildings, outdoor lighting can keep your establishment from having a drab exterior and lead to a better impression for guests. 

For a lot of commercial spaces, that first impression is the only chance you get to create a sense of welcome and professionalism. Uplighting helps create uniformity and a polished aesthetic, from dusk to dawn. And, as mentioned above, outdoor lighting helps reduce the chances of crime. Professional exterior uplighters can help design a lighting system that will not only enhance safety and security, but also make your commercial building more appealing to tenants, customers, and guests.

Uplighting for restaurants and event venues

Let’s say you’re strolling down the block one particular evening looking for a nice fine-dining restaurant and come across two situated next to each other. One is dimly-lit on the outside and looks shadowy and a little shoddy. The other has sleek lighting fixtures and a warm glow across the exterior. Which one will win your business? Most likely the latter. 

As with residential houses, the first place to start with restaurant or venue uplighting is the exterior of the building. Create that uniform look which makes your business stand out and leads guests to the entrance. Then try adding well-placed outdoor uplighting to highlight a sculpture, landscape features, seasonal plantings, hardscaping, water features, and trees. Even if your restaurant is indoors, the feeling of a spectacle unfolding will add enormously to the guests’ experience.   

All in all, uplighting is a foundational part of an outdoor lighting system. When done right, it adds depth and elegance. Want to get started with professional installation? Get in touch for a free consultation. If you want to tackle uplighting yourself, start with one project at a time. The only thing you shouldn’t do is take your outdoor lighting (no pun intended) lightly. 

Expert Tips for a Better LED, Low-Voltage Landscape Lighting System

Today’s landscape lighting has come a long way! Low-voltage exterior LED systems are the top choice for outdoor illumination, and for good reason. They’re economical, efficient, and durable – perfect for anyone looking to give their home a touch of personality after the sun goes down. In this post, we’ll take a closer look at what exactly makes LED landscape lighting so special – and why it’s quickly becoming the go-to choice for homeowners all over St. Louis.

There are four primary parts of this type of exterior lighting system:

  1. Transformer: the power source.
  2. Wiring: carries power from transformer to fixtures.
  3. Fixtures: many sizes, many styles.
  4. Bulbs: energy-efficient, long-lasting LED bulbs.

This type of exterior lighting system is safe, versatile, and long-lasting when properly designed and installed. And there are so many options — you can create a polished look for your home, add visual interest to every part of your yard, and set up outdoor living spaces that you love spending time in. 

Have fun with color

Want to have more fun with your outdoor lighting? You’ve got to have color-changing LEDs you can control from a smartphone app. Our customers love being able to adjust the lighting for different events and times. You can change the colors for different holidays and seasons to match your outdoor decor. And you can finetune the look for different activities — brighten up the lights for a party, or go dim for a quiet dinner. Even if the weather doesn’t allow for outdoor time, you’ll enjoy the variety of looks through the windows. 

Get the right transformer first

The transformer is the power source for the lighting system. There are different sizes of transformers, which have smaller or larger power capacities. A transformer with more capacity can provide power for a larger lighting system. It’s very important that the size of the transformer is adequate for your system — otherwise, you’ll quickly burn up your transformer. And it’s a smart idea to think about other lights you might want to add or projects you might want complete in the future that would expand your system even more. If you plan to add more lighting load to the system, it’s usually a smarter idea, and more budget-friendly, to purchase the larger transformer now. Otherwise, you might have to add another transformer to run your system. 

Plan the system in projects

When we install an exterior LED system, we separate it into projects. For example, the house uplighting is one project. The spotlights on the trees in the front yard are another project. The bistro and rail lighting for the deck is another project, and so on. Sometimes our customers want to install an entire lighting system and do all the ‘projects’ at once. Other times, they want to do one or two of the projects at a time. When the budget allows, they’ll move on to the next project. 

This is a great way to take a cohesive approach to the low-voltage lighting system for your home’s exterior, yard, and all those outdoor living spaces. When the design is cohesive, the whole effect is much, much better. But there’s no rush to get it all done at once. You can move at your own timeline without losing the overall look. 

Try Out Your Ideas

If there’s one thing we know for sure, it’s that what you imagine may not look at all how you’d expect. That’s why we’re always ready to come out and set up a demo for these landscape lighting systems. Sometimes, homeowners have certain ideas or expectations but when they see those actually set up, it’s not quite what they wanted:

  1. They need more fixtures than they thought. 
  2. They notice areas that need lighting. 
  3. They’re not sure of the best tone or intensity. 

Take the time to lay out lighting at night and see what it really looks like. Better yet, give us a call for a free consultation and demo!

The Many Benefits of Landscape Lighting

Have you ever noticed how a well-lit home looks more inviting, even if you can’t see what’s going on inside? There’s just something about a lit-up house that makes it look warm and welcoming. And that’s exactly what landscape lighting can do for your home—make it more inviting, increase its curb appeal, and even make it safer. Here’s a look at the benefits of landscape lighting.

1. Increase curb appeal.

Lighting is an essential component of landscape design, and when done right, it can add a whole new level of curb appeal to your home. In fact, nothing can beat the transformative power of uplighting. Unlike old-fashioned landscape lighting options that tended to cast harsh shadows and miss out on key features in a landscape, uplighting creates a warm and inviting glow that completely transforms a home’s curb appeal.

2. Boost property value.

Not only can landscape lighting increase your home’s curb appeal, but it can also actually increase its overall value. That’s because good landscape lighting can be considered a home improvement, and most home improvements tend to add value to a property. So, if you’re looking for a way to add some value to your home, landscape lighting is a great option.

3. Enhance safety and security.

When it comes to landscape lighting, there are a number of things you can do to enhance safety and security around your home. Perhaps one of the most important things is to incorporate motion sensor lights in strategic locations. These strategically placed lights will automatically turn on when someone moves in their range, helping to deter potential intruders and light up areas that might be difficult for you to see at night.

4. Create inviting outdoor living spaces.

Whether you prefer subtle, elegant fixtures or bright and bold ones that really make a statement, landscape lighting offers endless possibilities for adding beauty and individuality to any outdoor area. From soothing softly glowing paths to brilliant mixtures of color that pop against the night sky, landscape lighting allows you to create tailored spaces that reflect your personal style.

5. Highlight the best features of your landscape.

Whether you have gorgeous trees, stunning landscape features and landscaping, beautiful flower beds, or festive seasonal decor, landscape lighting is the perfect way to show them off and really make them shine. Well-placed fixtures with the right color temperature and intensity add an inviting layer of warmth and ambiance that’s sure to leave your guests impressed.

6. Create visual interest.

Landscape lighting is a great way to add visual interest and flair to your yard or outdoor spaces. Think about sitting around on the deck while colored lights flicker behind a water feature. Spotlights show off magnificent foliage in the fall and dramatic tree shapes in the winter. Even if it’s too cold to be outside, you can enjoy the visual diorama that good landscape lighting creates in your yard whenever you look out the window. 

7. Create safe and magical play areas for kids.

Whether it’s building a cozy little reading nook under a tree or creating magical teepee trails through the garden, landscape lighting adds an element of wonder and delight that kids will love exploring. Best of all, landscape lighting is subtle enough to stay out of the way while they play, so parents can rest easy knowing their kids are safe and happy. 

8. Extend outdoor time.

Contrary to what many people think, landscape lighting is not just for creating a pretty outdoor space. In fact, landscape lighting can help to extend outdoor time in countless ways. You’ll be able to spend more time outside without worrying about visibility; no need to pack things up after dusk. Landscape lighting ensures that you won’t be tripping over garden gnomes or stumbling down the stairs in the dark. 

9. Deter outdoor pests. 

When it comes to keeping your landscape thriving and pest-free, landscape lighting can be a real game-changer. Good exterior lighting can actually help to deter pests like rats, mice, and other rodents. These pesky creatures are attracted to dark environments, so they will often stay away from plants that have been well-lit. Plus, LED lights (which we use in all our outdoor landscape lighting) are the least attractive type of light for insects.

10. Host your own events. 

Whether you’re planning a big outdoor cookout with friends, or a small gathering in your backyard, landscape lighting can help set the perfect mood and add a touch of sophistication to any occasion. And with color-changing LED lights, you have complete control over the look and feel of your space. Set the mood and change the vibe as needed — from soft glows that give off a romantic vibe, to bright, inviting lights that make people feel welcome and excited to be there.

When it comes to landscape lighting in St. Louis, we put our heart into creating the best outdoor lighting design and making installation a fun, exciting, and hassle-free process for our customers. Get in touch for a complimentary consultation. Don’t miss out on the many benefits of landscape lighting for your home. 

What You Need to Know about Good Landscape Lighting Design

A well-lit home is both inviting and safe. It’s also a major selling point when it comes time to put your house on the market. While you might think that all you need is a few porch lights, proper landscape lighting design can make all the difference in your home’s appearance – and its security. Read on to learn more about how to create a beautiful and inviting nighttime atmosphere for your home.

How do you plan landscape lighting design?

  1. Make your preferences a priority.

There is no right or wrong way to landscape your yard, and there are countless different ways to design a landscape lighting plan. Some people prefer to start with the outline of the house and move outward, while others like to start with large focal points and work their way inward. Ultimately, it all comes down to your own personal preferences and what you want your finished landscape to look like.

  1. Think about how you use outdoor spaces.

It’s important to take into account how the lighting will be used. For example, do you want lights that highlight specific trees or large structures? Do you want areas of your yard where there is less light? What kind of activities do you enjoy outside? Would you like to have outdoor living spaces for relaxing and entertaining? 

  1. Take a project-based approach.

We advocate a project-based approach to your landscape lighting design. Here’s what that means: think about all the things you’d like to include in your landscape lighting. Go wild. Get inspiration from other homes in your neighborhood and creative, interesting ideas online. Take a drive through different areas at night and make notes about what stands out and looks great. Make a list of what you love, and then think about how you could use those ideas in your own yard and outdoor spaces. 

Once you’ve got a comprehensive picture of all the elements of a landscape lighting design you’d love to have, divide it into separate projects. For example, we recommend home uplighting as a great first step for landscape lighting. It makes a huge, immediate difference in how your home looks and feels, and increases curb appeal. So, home uplighting might be your first project. You can prioritize projects by what seems most fun or by seasonal factors: for example, if it’s getting close to summer, you might want to focus on outdoor living spaces in your backyard and hold off on the pathway lighting out front. 

How do I light up my landscape? 

  1. Choose the right type of landscape lighting fixtures. 

There are several different types of landscape lighting fixtures. Each type has different uses. 

  • Spotlights are great for highlighting specific areas or architectural features in your landscape. 
  • Path lights are shorter, with a downward beam to provide subtle lights for walking paths, sidewalks, etc. 
  • Flood lights are used to illuminate large areas, such as a patio or driveway. Motion sensor flood lights are typically used for security, mounted high on house corners and around doors or outdoor structures. 
  • String lights are for more than holiday decor! Permanent outdoor string lights, whether bistro style or with smaller “twinkle” bulbs, add an enchanting touch. 
  • Bollard lights are tubular lights often used to line driveways. 
  • Wash lights create a horizontal “wash” of light on hardscaping. They’re often used on landscape walls. 
  1. Think about where to place outdoor lighting fixtures.

Where you place your lighting fixtures will have a big impact on the overall look of your design. Here are the factors to consider:

  • Spacing: Generally speaking, you need more fixtures than you think you do. Too few fixtures will create odd, shadowy gaps between your beautifully light elements. That can make the whole effect dingy rather than warm and polished.
  • Angle: Play with the angle of the fixture to ensure that the light shines where you want it and doesn’t create dark areas. 
  • Spread and intensity of beam: Some fixtures have adjustable covers that allow you to change how wide the beam is. The intensity, or brightness, of the beam will determine how far the light reaches.

Landscape lighting design is more important than you may think. By taking the time to plan your landscape lighting design, choosing the right fixtures, and placing them well, you can create a livable outdoor space that’s perfect for entertaining, relaxing, or simply enjoying your favorite outdoor activities. If you’re not sure where to start, reach out for a free consultation. We’ll work with you to create a custom plan that meets your needs and makes your outdoor space look amazing.

Use This Fall Clean-Up Checklist to Get the Garden and Yard in Shape Before Winter

After a long and muggy St. Louis summer, the cooler temperatures of fall are welcome and invigorating. Okay, maybe the fall-time allergens like ragweed aren’t so welcome, but we still love everything else autumn brings our way. Simmering soup in a crockpot, mums and hay bales on the porch, pumpkins, and apples, and Halloween parties. Fall is the perfect time to get your garden and yard cleaned up and in shape before the holiday season that’s waiting just around the corner. Use this handy fall clean-up checklist and make quick work of the fall maintenance chores, so you can get back to sipping cider and enjoying the breeze. 

1: Do NOT trim hedges, bushes, and shrubs. 

The first one is so easy, you’re going to love it: it’s a task you do not need to tackle during the fall. While fall might seem like a good time for pruning back those bushes in front of the house, resist the urge. Why? Because trimming back branches before the truly cold weather has started might actually promote new growth. If that growth doesn’t have enough time to harden before the first frost, the shrub can be damaged. (See here for more details.) So leave this chore off the list! 

Generally, it’s advised to prune spring-flowering shrubs during their growing season and fall-flowering shrubs in the winter.

2: Do NOT trim trees in the fall either.

Is this the easiest chore list you’ve ever had, or what? We promise we’ll start giving you actual things to do soon. But for the same reason mentioned above, strike ‘tree trimming’ from your normal fall list. We know that fall weather makes you think of lumberjacks and chainsaws but resist the urge. Trimming trees will stimulate new growth, the growth won’t have time to mature and harden, and those first frosts can cause damage to the trees. 

But don’t worry, you can still use your chainsaw in the fall (more on that below). 

3: Clean up branches and debris.

What you can do (or corral your kids into doing) is clean up fallen branches, sticks, and debris. This chore alone can make things around your yard look 100% better. Get out on a cool fall morning and drag all the larger yard debris into a pile. Then go through landscaped areas, flower beds, and under trees and do the same thing. 

4: Clean up the garden for winter. 

It’s time to say goodbye to the garden plants until springtime. Bring in that last harvest, then pull up plants and gather debris from the garden. Separate natural debris, such as leaves, plants, stalks, and weeds from non-biodegradable debris (plastic landscape sheeting, plant markers, wire supports). 

5: Weed the flower beds. 

Take advantage of the cooler temperatures to get in one last thorough weeding of all the flower beds and landscaped areas. If you’ve encountered some of the nasties like poison ivy or poison oak in your yard or garden before, be on the lookout. Wear a long-sleeved shirt, gloves, and a mask or bandana over your face for more protection.

6: Clean out the gutters. 

This is one chore you definitely want to get out of the way before winter sets in, but you do need to time it properly. Gutters tend to get clogged up by all the falling leaves, so if you tackle this chore too early in the fall, you’ll end up doing it again. Nobody wants that! Pay attention to the trees closest to your home, and when they’ve shed most of their leaves, put “gutters” on your weekend to-do list. 

7: Aerate the yard. 

Aeration is a standby for fall maintenance, with good reason: it helps break up overgrown, tangled mats of roots under the grass and loosens up the soil beneath. Soil that’s too densely packed won’t be able to absorb water or nutrients as well, which means grass won’t thrive like it could. So rent an aerator or call in a yard crew so your yard has its best shot and looks great next spring. 

8: Fertilize the yard. 

Post-aeration is a great time to fertilize the lawn. The soil will be ready to absorb, and fall is prime time for grass fertilization. The pros advise a timeline of 2-3 weeks before the first frost of the season. Since the usual first frost in St. Louis is around the 3rd or 4th week of October, plan on fertilizing the yard the first week of October. 

9: Mow the yard one last time.

You might think you’ll get to put away the lawn mower the same weekend you fertilize the yard, but that may not be true. Grass stops growing (goes dormant) when the soil temperature gets low enough. Since fall temperatures in St. Louis can fluctuate like crazy, you may still have growth happening in late October. Just keep an eye on things, and mow at your regular blade setting for the last cut of the season. 

10: Dispose of yard and garden debris. 

Most municipalities have certain days for large item pickup and for yard/garden debris. Check with your local city office to find out what the schedule is, then get the appropriate containers — usually the large, heavy-duty paper bags that you’ll see stacked by the curb. Fill these with the garden and yard debris you’ve collected from all that hard work. Be sure to dispose of the non-biodegradable debris in the trash can, not the yard bags.

11: Divide spring-blooming perennials. 

Don’t mess with the fall-blooming perennials. Now is their time. Leave them alone so they can do their thing, and you can enjoy it. For the spring-bloomers, though, fall is a great time to divide and spread the wealth. Dig in, separate clumps gently at the roots, and fill in those sparse areas so you’ll have a beautiful show when spring rolls around. 

12: Plant fall annuals. 

You can fill in those blank spots right now with fall-blooming, or hardy, annuals. Mums are everybody’s favorite, but there are other options. Petunia (technically a semi-hardy annual) will lavish fall-time color. Also worthy of inclusion in your fall flower beds: pansies, alyssum, marigolds, and celosia. 

13: Put down a fresh layer of mulch.

Mulch makes everything look neat and fresh, and helps hold in soil nutrients. Once you’ve rearranged the perennials and added those flowering pops of color for falltime, lay down fresh mulch for a final touch. 

14: Winterize equipment and clean outdoor tools.

When you’ve finished the last mowing, be sure to winterize the mower and any other yard or garden equipment. Usually, this involves an oil change (for the four-cycle equipment), adding fuel stabilizer, doing a good inspection, cleaning, and covering. See a more thorough guide here.

15: Winterize hoses and spigots. 

Nobody wants frozen pipes this winter. Empty out garden hoses — if you can, hang or drape from deck railings or sturdy tree branches for an hour or two to drain thoroughly. Then coil and store hoses in the garage or shed. It’s a smart idea to install outdoor faucet covers over any exposed spigots. If you need to leave one hose out for a few end-of-season needs, disconnect it from the spigot. 

16: Prep for nights around the firepit.

Cooler weather doesn’t mean you don’t get to enjoy the outdoors! If you’re raring to use that chainsaw, here’s the chore you’ve been waiting for. Cut firewood into lengths that fit easily into the fire pit (and be sure to follow all safety precautions while doing so). Stack wood up and keep it covered. Collect the sticks and twigs in a barrel to use for kindling, and you’re all set for cozy evenings around the fire. 

Want to make fall even more magical? Check out these ideas, then get in touch to find out how we can make it come to life for your home! 

These Fall Decorating Ideas Will Make Your Front Yard Pop

Spring and summer get a lot of attention when it comes to outdoor decor and landscaping ideas, but we think fall is the real star of the show. You can achieve any kind of mood, from restrained and classy to all-out spooky. You can focus on harvest themes or hang ghosts from the trees and nobody is going to think it’s odd. Plus, as the leaves fall, your front yard decorating efforts will become more of a focal point. Why not have some fun and make your front yard pop with some of these ideas that will take fall decorating from passé to popping?

Monochromatic mums

We love mums, and they look great displayed on a porch or along the sidewalk. Take your mum display up a level by sticking to a single color for maximum visual impact. Monochromatic might seem boring but the results are stunning. Choose your favorite chrysanthemum color, then group the mums in planters, on the porch stairs, or plant along the front of landscaped beds once you clean out the summer annuals. 

Match the mood with lighting

Now take the monochromatic mum display to top-level decor by using exterior lights that match the mums. Modern landscaping LED lights have all sorts of magical color-changing capabilities. Use a few strategically placed spotlights that are color-tuned to match your mums. Hang string lights across the front porch, set to the same color. 

Harvest at home

We love pumpkins and hay bales and scarecrows as much as the next person, but what most people do gets kind of boring: a pumpkin or two on the steps, maybe a little hay bale peeking out behind the mums, a scarecrow wall-hanging by the front door. You can do better, and here’s how: get maximum harvest-themed curb appeal by grouping all these elements together. Choose a flower bed, a spot in your front yard, or the base of a tree that has gorgeous foliage in autumn. Arrange the elements together in one place for a beautiful, high-impact harvest display. 

Glittering gourds

For an eye-catching fall decoration, gather up gourds in all sizes. Get a variety of shapes for a more interesting arrangement. Spray paint gourds with sparkling metallics. You can stick to silver or gold, or do a mix of metallic shades for more depth and interest. Let the paint dry thoroughly, then arrange the glittering gourds in a basket near the front door or place in planters along the sidewalk. Be sure that some of the exterior lights are angled to catch the painted gourds and show off that glitter at night. 

Trim a tree

Yes, yes, we know it’s not time to get out the Christmas tree decorations yet. But who says tree trimming is only for the winter holidays? Autumn is the perfect time to highlight trees as their foliage moves through each stage of beautiful color. First, consider lighting: you can use spotlights aimed upward at an angle to show off the tree. Pull out the smallest varieties of those glittering gourds and hang from the lowest branches with twine so they catch the light. Want to amp up the spooky factor? Add Halloween decor like ghosts and bats as part of your tree decor. 

A few final fall decoration tips

There are two factors that will help any type of fall decoration look best: first, grouping for visual impact and second, smart lighting to show off the decor. Grouping by color (like those mums) or pulling elements together into a single display creates a stronger visual impact and is cheery and fun while looking impressive. Grouping doesn’t mean you’re limited to one color; just find ways to build groups rather than scattering the decorations out. Groupings catch the eye. And the right lighting will let your decorations stand out even as the days grow shorter and dusk comes earlier and earlier. Plus, with the fun color capabilities of LED lights you can get creative with how you show off different elements of your fall decorations at night. Your front yard can have a whole different look when the lights come on. 
Here’s to a great fall! Get in touch for help with your exterior lighting, from color-changing LED string lights to lighting effects like moonscaping. We’re here to help.

6 Questions to Ask an Outdoor Lighting Designer in St. Louis

Did you know that 70% of Americans invested in a home improvement project in 2020? And in 2021, they did even more, according to surveys: homeowners averaged 2.7 projects in 2020, and in 2021, that average went up to 3.7 projects, each costing an average of $2,800. Outdoor improvements are trending, including outdoor lighting projects, with more homeowners completing outdoor projects and upgrading their outdoor living spaces. If you’re considering exterior lighting or an outdoor project that involves lighting, here are the key questions to ask an outdoor lighting designer in St. Louis to make sure you get the best illumination for your dollar. 

“Outdoor Lighting Solutions was fabulous to work with. We had a week-long event for 1000+ people and they lit an entire quadrangle for us. It looked great and the pricing was excellent. Daniel was very responsive, helpful, and easy to work with. Highly recommend them.” 

– Andrew J.

How much experience do you have?

Experience isn’t everything, but it certainly helps. You want to work with outdoor lighting professionals who not only create a customized lighting design, but also know how to overcome any challenges they’ll face when installing it. Not all yards (or homes) are created equal, and sometimes you’ll need creative solutions to get the outdoor lighting you want. 

“Daniel and Jeremy are pros in the field! They have excellent customer service skills and are experts at helping the client choose the best lighting to suit their needs. No high pressure gimmicks. They put demo lights in place to make sure you like what you see. Excellent communication!” 

– Sheri Hogland

Do you specialize in outdoor lighting? 

There are three types of professionals you’ll encounter when looking for an outdoor lighting designer. First, you’ll find landscaping companies who also install exterior lighting. They might be experienced, but if they don’t specialize in outdoor lighting they might not be able to offer all the options and customizations you need for the perfect lighting design. The second type of person is a lighting designer, someone who specializes in lighting design but may not specialize in outdoor lighting. The third type is the outdoor lighting specialist: this is a professional who works day in and day out in outdoor lighting design, installation, maintenance, and repair. (Hey, that’s us!)

“Daniel and Jeremy are the best at what they do. They show up on time and complete tasks quickly and efficiently and maintain lighting after installation with any needed tweaks. Not enough good things can be said about this company.” 

– Mary Jane L.

Do you have any references?

References can take a lot of different forms, from online reviews to personal referrals to completed projects you can view for yourself. Ask for references related to the type of outdoor lighting project you want to have done. For example, if you want lighting for an event, that’s the type of reference you want to hear. Or, if you want to get residential exterior lighting done, ask for those types of references. Good references are proof of quality before commitment. 

“They cleaned up and did a wonderful magnificent job. I was really happy. I have hired them twice. On the second trip they were able to do a job that 2 previous companies could not. If you want a job done right this is the company to hire!” 

– Paula P.

How do you design custom lighting systems?

What’s the process used by the outdoor lighting designer in St. Louis that you’re talking to? This question can really help you sort out the best candidates from the rest. Many lighting companies will have a few standard lighting system designs that they always use. They might tweak a fixture here or there, but it’s not really a custom lighting design so you may not have all the options you want to create the perfect lighting look. Look for a designer who wants to know about your goals and is able to create a unique and perfect lighting design for what you want.

“Outdoor Lighting Solutions worked with me to design the perfect lighting for my property. I had a rough idea of what I wanted, and they helped me to develop it into beautiful lighting for a hardscape wall and bistro lighting for my patio. I couldn’t be happier with my outdoor lights!” 

– Valerie Geile

Can you give me a quote and a timeline?

Ask for clear and upfront pricing and communication about how the process goes, from beginning to end. This shouldn’t be a guessing game! The best outdoor lighting designers in St. Louis can give you a quote based on the design, site, and number of fixtures. They’ll also be able to provide you with a clear timeline. If there are changes beyond their control, they should quickly communicate with you and let you know what the next steps are to keep the lighting system installation on track. Don’t be afraid to ask questions and be sure you understand the process, the costs, and the schedule.

“It went very well. They came to our house to give an estimate, discussed what we wanted, and made several excellent suggestions which were much better than the discussion with another company (and it was significantly cheaper as well). They were very professional, obviously knew what they were talking about, gave us options, and set up a date to bring and turn on the two specific lights that we were interested in. We made our decision, they installed the lights in a timely manner, and the lights worked perfectly and we are delighted with the result. We highly recommend Outdoor Lighting Solutions.” 

– Jan W.

Can I see a demo first? 

You might be surprised how many options there are in outdoor lighting designs. And when you change one element of the design, the resulting differences can be pretty dramatic. Seeing what your lighting design will actually look like before you commit is an important step. Do you prefer a warmer yellow tone, or a cooler white tone? How bright do you want those landscape spotlights to be? Some questions you can’t answer without a demo, so be sure you can get one and know you’re getting the lighting design that feels and looks just right.

“Great team to work with. They provided a great lighting plan and even allowed us to “test drive” the lights before installing. We were very pleased with the outcome too.” 

– Todd W.

Ready to get started with a custom outdoor lighting design for your St. Louis home, business, or event? Get in touch today!